")
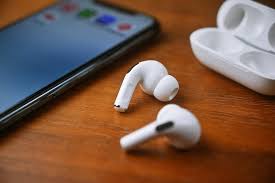
Getting a new pair of wireless earbuds is always an exciting moment. You unbox them, admire the sleek design, and get ready to listen to your favorite playlist. However, the technology can sometimes feel a little confusing if you aren’t sure where to start. Whether you have the latest iPhone or you are trying to use Apple earbuds with an Android phone, knowing exactly how to connect airpods can save you a lot of time and frustration.
These tiny devices are designed to be smart and intuitive, but they still rely on Bluetooth technology to work. This means there are specific steps you need to follow depending on which gadget you are using. In this comprehensive guide, we will walk you through every single scenario. We will cover Apple devices, non-Apple phones, computers, and even troubleshooting tips for when things don’t go as planned. By the end of this article, you will be a pro at managing your audio connections.
Key Takeaways
- Automatic Pairing: Learn how the “magic” one-tap setup works for iPhone users.
- Cross-Platform Use: Discover that you can use AirPods with Android and Windows.
- Troubleshooting: Find out how to reset your device if it refuses to pair.
- Status Lights: Understand what the flashing colors on your case actually mean.
1. Preparing Your Devices Before Pairing
Before we dive into the specific steps of how to connect airpods, it is essential to make sure everything is ready. Many connection issues happen simply because the basics were overlooked. First, check your battery levels. Your earbuds need to have enough charge to establish a wireless connection. If they are brand new out of the box, they usually have some charge, but it is a good idea to place them in their case and charge them for at least 15 minutes.
Next, ensure that Bluetooth is turned on for the device you want to pair with. Whether it is a smartphone, a tablet, or a laptop, the Bluetooth radio must be active to find your earbuds. Also, check for software updates. Apple frequently releases updates for iOS and macOS that improve connectivity. If your iPhone is running an old version of iOS, it might not recognize newer models of earbuds. Taking these few minutes to prepare will make the actual connection process much smoother and faster.
2. How to Connect AirPods to Your iPhone
The process for connecting to an iPhone is incredibly simple thanks to the H1 and H2 chips inside the earbuds. Apple designed this to be a seamless experience.
The “Magic” One-Tap Setup
If you are using an iPhone, you get to experience the easiest setup method available. Unlock your iPhone and go to the Home screen. With your earbuds inside the charging case, open the lid and hold it right next to your phone. Within a few seconds, a setup animation should appear on your iPhone screen. This animation will show a picture of your specific model spinning around.
You simply need to tap “Connect.” If you have “Hey Siri” set up on your iPhone, it is automatically ready to use with your earbuds. If you haven’t set it up yet, the screen might guide you through a brief setup. That is usually all there is to it. Once this is done, your earbuds are paired not just to your phone, but to every Apple device signed in to your iCloud account. This magic setup is why people love the Apple ecosystem so much.
Manual Pairing via Settings
Sometimes, the animation doesn’t pop up. This can happen due to interference or minor software glitches. If that happens, do not worry; you can still learn how to connect airpods manually. Go to the “Settings” app on your iPhone and tap on “Bluetooth.” Make sure the Bluetooth toggle is green.
Next, locate the small circular button on the back of your charging case. With the lid open and the earbuds inside, press and hold this button. Watch the status light on the case. It should flash amber and then turn to a pulsing white light. This white light means it is in pairing mode. Look at your iPhone screen under “Other Devices,” and you should see your earbuds listed there. Tap on the name, and they will connect immediately.
3. Connecting to an iPad
Since iPads run on iPadOS, which is very similar to the software on the iPhone, the connection process is almost identical. If you have already paired your earbuds to your iPhone and your iPad is logged into the same iCloud account, you actually don’t need to do anything. They should already be available in your audio output list.
However, if the iPad is your primary device, you follow the same steps as the iPhone. Bring the open case close to the unlocked iPad. Wait for the animation. If it doesn’t appear, go to Settings > Bluetooth, hold the pairing button on the case, and select the device from the list. It is helpful to remember that while iPads are larger, they use the exact same Bluetooth protocols, so the experience is consistent.
4. How to Connect AirPods to a Mac Computer
Connecting to a Mac can be slightly different depending on your macOS version.
Using iCloud Automatic Switching
If your Mac is using the same Apple ID as your iPhone, and you have Handoff features enabled, learning how to connect airpods is effortless. You usually just need to put the earbuds in your ears and click the Bluetooth icon or the Volume icon in the menu bar at the top of your screen. Your earbuds should appear in the “Output” list.
Manual Bluetooth Connection on Mac
If they aren’t showing up, or if you are using a shared Mac, you will need to pair them manually. On your Mac, choose the Apple menu in the top left corner and select “System Settings” (or System Preferences on older models). Click on “Bluetooth.” Make sure Bluetooth is on.
With your earbuds in the open case, press and hold the setup button on the back of the case until the status light flashes white. Your Mac should now display the earbuds in the “Nearby Devices” list. Click “Connect” next to the name. Sometimes, you might be asked if you want to use Siri with the Mac as well; you can choose to enable or disable this based on your preference.
5. How to Connect AirPods to Android Phones
A common misconception is that these earbuds only work with Apple products. That is not true! They work as standard Bluetooth headphones on any device.
Putting AirPods in Pairing Mode
To connect to an Android device, you have to treat the earbuds like any generic Bluetooth headset. First, on your Android phone, go to Settings > Connections > Bluetooth to ensure Bluetooth is on. Then, open the lid of your charging case (keep the earbuds inside). Press and hold the white button on the back of the case.
Wait until the light on the front or inside of the case flashes white. This signals that they are searching for a device. Look at your Android phone’s screen. Under “Available Devices,” you should see the name of your earbuds appear. Tap on it to pair. You might see a prompt asking to confirm the pairing request—just tap “Pair” or “OK.”
Feature Limitations on Android
It is important to note that when learning how to connect airpods to Android, you lose some “smart” features. The automatic ear detection (where music pauses when you take one out) generally won’t work. You also won’t be able to use Siri, and you cannot check the battery life of the case or earbuds natively on the Android screen without downloading third-party apps. However, the core functionality—listening to music and making calls—works perfectly fine.
6. How to Connect AirPods to a Windows PC
Many people use iPhones but work on Windows computers. Connecting your audio across these platforms is very useful for Zoom calls or listening to music while you work.
Steps for Windows 10
On your PC, open the Start menu and click on the “Settings” gear icon. Go to “Devices” and then “Bluetooth & other devices.” Click the big button that says “Add Bluetooth or other device.” A black window will pop up; click “Bluetooth.”
Now, grab your charging case. Open the lid and hold the button on the back until the white light pulses. Your PC will search for available devices. When you see your earbuds appear in the list, click on them. Windows will set up the drivers and tell you when the device is ready to go.
Steps for Windows 11
The process is similar but looks a bit more modern in Windows 11. Press the Windows Key + I to open Settings. Click “Bluetooth & devices” on the left sidebar. Toggle Bluetooth on if it isn’t already. Click the big “Add device” button.
Select “Bluetooth” from the options. Put your case in pairing mode (holding the back button until white light flashes). Select your audio device from the list on the screen. Windows 11 is generally better at handling Bluetooth audio than Windows 10, so you might find the connection is more stable and the audio quality is slightly better.
7. Understanding the Status Light
The little light on your case is your best friend when trying to figure out how to connect airpods or diagnose issues. It speaks a simple color-coded language.
|
Light Color |
Status Meaning |
Action Required |
|---|---|---|
|
Solid Green |
Fully charged |
Ready to use. |
|
Solid Amber |
Less than one full charge left |
Charge the case soon. |
|
Flashing White |
Pairing Mode |
Ready to connect to a new device. |
|
Flashing Amber |
Error / Reset Required |
You need to reset or re-pair the device. |
|
No Light |
Battery Dead |
Plug in the charger immediately. |
Understanding these lights saves you from guessing. If you are trying to pair and you don’t see a flashing white light, you know you haven’t pressed the button long enough or the battery is too low.
8. Switching Between Devices Automatically
One of the coolest features introduced in recent years is automatic switching. This allows your audio to move seamlessly between your iPhone, iPad, and Mac without you touching a button. For example, if you are listening to a podcast on your iPad and a phone call comes in on your iPhone, the audio will automatically switch to the phone so you can answer.
To make sure this works, all devices must be signed in to the same Apple ID using two-factor authentication. However, some users find this annoying if it switches when they don’t want it to. If you want to disable this, go to Settings > Bluetooth on your iPhone, tap the “i” next to your device name, and change “Connect to this iPhone” from “Automatically” to “When Last Connected to This iPhone.”
9. Troubleshooting: What If They Won’t Connect?
Even the best technology fails sometimes. If you are following the instructions on how to connect airpods and it just isn’t working, don’t panic. The most common fix is toggling Bluetooth. Turn Bluetooth off on your phone, wait ten seconds, and turn it back on. This resets the radio and clears temporary glitches.
If that fails, tell your phone to “Forget This Device.” Go to Bluetooth settings, tap the “i” or gear icon next to the old connection, and select “Forget.” Then, try the pairing process from the beginning as if they were brand new. Also, check for physical debris. Sometimes pocket lint gets stuck in the charging case ports, preventing the earbuds from knowing they are in the case, which stops the pairing process.
10. How to Reset Your AirPods
If you see the dreaded flashing amber light, or if one earbud works but the other doesn’t, a factory reset is usually the solution. This wipes the memory of the earbuds and returns them to their out-of-the-box state.
- Put your earbuds in the charging case and close the lid. Wait 30 seconds.
- Open the lid of your charging case.
- On your iPhone or iPad, go to Settings > Bluetooth and tap the “i” icon next to your device. Tap “Forget This Device” and confirm.
- With the lid open, press and hold the setup button on the back of the case for about 15 seconds.
- Watch the status light carefully. It will flash amber, and then eventually flash white.
- Once it flashes white, you can release the button. They are now reset. You can now follow the standard setup process to reconnect them.
11. Keeping Firmware Updated
Did you know your earbuds have their own operating system called firmware? Apple updates this automatically to fix bugs and improve connection stability. Unlike an iPhone update, you cannot force a firmware update manually with a button.
To ensure your device gets updated, simply use them normally. The update happens when the earbuds are in the charging case, the case is plugged into power (or on a wireless charger), and your iPhone is nearby and connected to Wi-Fi. If you keep having connection drops, it might be because the firmware is out of date. Just let them charge overnight near your phone, and the system will handle the rest.
12. Audio Sharing Features
Another benefit of knowing how to connect airpods properly is the Audio Sharing feature. This lets you and a friend listen to the same song or watch the same movie on one iPhone using two different pairs of wireless earbuds.
To do this, connect your pair to your iPhone first. Then, tap the AirPlay icon in the Control Center or on the lock screen. You will see an option that says “Share Audio.” Tap that, and then hold your friend’s case (with their earbuds inside) close to your phone. A prompt will appear allowing them to join. This is perfect for plane rides or quiet study sessions where you want to share media without playing it out loud.
13. Staying Informed on Tech Trends
Technology moves fast, and keeping your devices working smoothly often requires staying up to date with the latest tips and news. Connection methods can change slightly with new iOS updates or new hardware releases. It is always smart to read up on tech guides when you encounter a new problem.
For reliable updates on technology, lifestyle, and general news that might affect how you use your devices, you can visit resources like British Newz. Keeping an eye on tech news ensures you aren’t left behind when Apple introduces new features like Spatial Audio or improved device switching.
14. Optimizing Sound Quality
Once you have successfully connected, you want the best sound possible. Go to Settings > Bluetooth and tap the “i” next to your connected device. Here you can run the “Ear Tip Fit Test” if you have the Pro model. This test plays sounds to see if the seal in your ear is tight enough.
A good seal is crucial not just for noise cancellation, but for bass response. If the seal is loose, the music will sound tinny and flat. You can also adjust the Equalizer (EQ) in your music app settings to boost bass or vocals depending on what you like to listen to. These small adjustments make the effort of learning how to connect airpods worth it.
15. FAQ: Common Questions About Connecting
Q: Can I connect to two devices at once?
A: Not simultaneously for audio playback. You can switch between Apple devices automatically, but you cannot play music from an iPhone and a Mac at the exact same second.
Q: Why is only one earbud working?
A: This is usually a syncing issue. Put both back in the case, close the lid for 10 seconds, and try again. If that fails, perform the reset described in section 10.
Q: Do they work with gaming consoles?
A: The PS5 and Xbox do not support Bluetooth audio natively. You usually need a Bluetooth dongle or adapter plugged into the controller or console to make it work.
Q: How far can I walk away from my phone?
A: Bluetooth 5.0 generally allows for a range of about 30 to 60 feet, depending on walls and obstacles. If you go too far, the audio will chop and then disconnect.
Conclusion
Mastering the process of how to connect airpods opens up a world of convenient, high-quality audio. Whether you are sticking strictly to the Apple ecosystem with an iPhone and Mac, or mixing things up with an Android phone or Windows PC, the process is straightforward once you know the steps. From the “magic” one-tap setup to the manual pairing button on the back of the case, you now have the knowledge to pair your earbuds with virtually any modern device.
Remember to keep your case charged, keep your devices updated, and don’t be afraid to use the reset function if things get glitchy. Technology is meant to make life easier, and with these tips, your listening experience will be hassle-free. For more detailed technical specifications and history regarding these devices, you can always refer to the Wikipedia page on AirPods. Enjoy your music!

